Monday, October 31, 2016

Happy Birthday Matey!! =)

Hello Mint Owl Studio Friends and
HAPPY HALLOWEEN!!
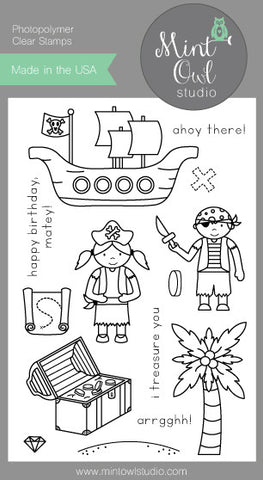
Larissa here today to share a FUN Interactive Happy Birthday Matey Card!! I wanted to make something that would correlate with Halloween and I thought this was the PERFECT choice!!
I started by Stamping and Embossing ALL of my Images from the AWESOME
"A Pirate's Life" Stamp Set!!
A Pirate's Life
 I used my Distress Inks to Watercolor them!! I Fussy Cut them out and leaving a small white border to Finish off the Edges!! I wanted to create an Interactive Card so I created the Channel in the Ocean for the Pirates Ship to be able to Glide across the Ocean and to Land on the Shore!! I Layered all of the other Images and Stamped and Embossed the Sentiment too!! I just LOVE LOVE LOVE the way it turned out!! =)
                           
 Hopefully you feel INSPIRED to create a FUN Interactive Card using your Mint Owl Studio Products and if you do I hope you'll share the with us because we LOVE LOVE LOVE to see what you create!! THANKS SO MUCH for stopping by today and I hope you have a
FABULOUS WEEK!!
COUNTRY HUGS-N-KISSES
LARISSA     =)


Saturday, October 29, 2016

Deck the Halls

 Hello everyone,

I'm back with a Christmas card from our Trim the Tree stamp set and the Christmas Quilt Stencil.

As I was creating this card my daughter wanted to help so she fussy cut one of the boughs and I added it along with the others.  She will be tickled that it made it to a blog post!


I stamped and coloured in the ornament and pine boughs black in and coloured them in with my copics.  I fussy cut these out and for the ornament, I added glossy accents to make it shiny.

For the front panel, I used the Christmas Quilt Stencil and blended in Candied Apple and Lucky Clover distress inks.


To create the card base I die cut two panels and scored one of them on the top at about 1/4 down and adhered it to the front panel making this a shaped card.  

I cut out a smaller panel and stamped the sentiment with black ink and popped it up on foam tape.  I then added the boughs and ornament. 

Thanks for stopping by, see you again soon. 

Coralynn  :)


Thursday, October 27, 2016

One-Layer Card featuring Ice Cream, You Scream

Happy Thursday, friends!  It's Tara and today I thought I'd take a break from Halloween and fall card making to create a fun and colorful anytime card!  I just love the Ice Cream, You Scream stamp set and I hadn't had the chance to use all of the super adorable little smiley faces that are included so I really wanted to stamp out some smiley ice cream cones!


I kept this card nice and simple by doing some easy masking to create a one-layer design.  I first stamped all three of my ice cream cones and my sentiment.  Next, the cutie little smileys were added. I created one mask of the ice cream cone and used a circle die to cut a piece of mask paper to create a reverse mask - I didn't use the circle but rather the remaining mask paper so I could ink up inside the circle. 


By first masking the ice cream cone and then placing my circle reverse mask over the top I was able to create the fun spotlight effect behind each cone!  I overlapped my colors to add more dimension but you don't have to do that if you don't want to.  Here are a few tips I picked up while doing this technique that I'll remember for next time: 1) Let the ink on your mask fully dry before applying ink over the top to avoid black smudges, 2) don't use a stitched die for your circle unless you want ink to show through the stitching detail, and 3) Mama Elephant pigment inks are GORGEOUS and blend really easily!!  It's all just trial and error and I love to learn from my mistakes so that I can avoid them next time!


I used Prismacolor pencils and Gamsol to color in my ice cream so that they would have the same smooth, blended look at the background circles.  Every time I use this technique I just love it and wonder why I don't use it more often!  Need to log that away for future projects!


I hope you enjoyed this bright and cheery card!  Don't you just love that sentiment?!  Thanks so much for stopping by and I'll catch you next time!  Bye!

Wednesday, October 26, 2016

Sparkly Season's Greetings

Hello!  It is Lisa here with you today and I have a super sweet and sparkly Christmas card to share.  This card was created with the new Cardinal Greetings Stamp set and I just love the classic elements in this set and all of the various ways you can use them...


To create this card I started with an oval frame diecut out of the middle of my card front.  I then stamped my bird and tree image onto separate Neenah White Card stock, colored them in with my Copics and white gel pen, and trimmed them out.  These were set to the side while I cut a piece of acetate slightly larger than the oval window and adhered double sided tape to cover the entire piece of acetate.  This too was set to the side while I adhered the tree branch to the backside of the oval, and the bird onto the front side.  The adhesive covered acetate was then laid behind all of this covering the open "window", and then covered with Martha Stewart glitter.  At first I had contemplated using white glitter to give a snow effect, but I felt like it would blend too much into the cardbase and so I chose the blue to really give a pop, and it did!  I then finished the card by stamping the sentiment in a green ink and adhering some Pretty Pink Posh Sequins.

Thank you for stopping by and Happy Crafting!
Lisa

Tuesday, October 25, 2016

If It Was My Birthday...

Good morning everyone! It's Cassie back with another card today! I've got a card using the Coffee Craze stamp set and the brand new Snarky Birthday Sentiments stamp set. When my sister read the sentiment that I used today she said it sounded just like me. So of course I had to use it! Here's a look at the card


The card today was really easy to make. I started with a piece of Bristol Smooth cardstock. I've been reaching for this nonstop lately because it blends my Distress Ink so well. It's nearly fool proof-which is awesome. I put down lines of washi tape to create a masked stripe pattern. Then I took the colors Stained Walnut, Picked Raspberry and Spun Sugar and blended the colors onto the cardstock. I spritzed the paper with water to get the splotchy distressed look.
Next I stamped my all time favorite coffee cup stamp onto some more Bristol Smooth cardstock. What I love about this image is that it can be more than just coffee. I'm not a coffee drinker, so I like the versatility there. I used my Distress Inks and a paint brush to color it in. I made it look like one of those cotton candy frappes that you can get from Starbucks so that it would match my color combo. I LOVE those things. Just looking at the card makes me want to go get one! When that was completely dry I heat embossed the "treat yo' self' sentiment onto the cup. It's hard to see because it was embossed with white embossing powder, but in real life it's pretty dang cute.
 
Finally I stamped my sentiment on the bottom, center of the card panel and heat embossed it with gold embossing powder. This sentiment just cracks me up! I love this set because I'm such a sarcastic person, and it fits my personality so well. After that was heat set all that was left to do was to pop the drink onto the card using some foam tape.

I hope you enjoyed the card for today! Who else is going to run out and grab their favorite drink now? I'm thinking a caramel apple spice from Starbucks!! Thanks for stopping by and I'll see you again soon with another card!
Monday, October 24, 2016

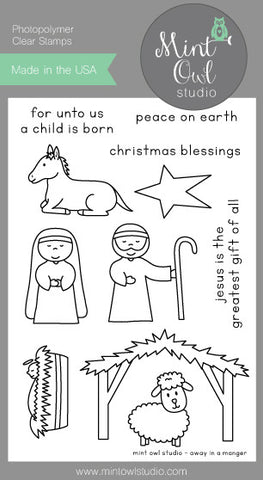
Christmas Blessings One Layer Scene!! =)

Hello Mint Owl Studio Friends!!
Larissa here today with a very Sweet and Simple Card Design using the "Away In A Manger" Stamp Set!!
Away In A Manger
I was going for a Soft Scene using the Manger and Baby Jesus and the North Star, but I didn't want to loose the scene against a really Dark Sky so I opted for a lighter sky color using Tumbled Glass and I REALLY LOVE the way that it turned out!! I Stamped and Embossed ALL of my Images and then I watercolored using Distress Inks!! I added some Glitter Pen to the Star and the top of the Manger and then Stamped and Embossed the Sentiments and my Card was done!! I LOVE Cards like this for Mass Producing especially during the Holiday Season!! It makes it SO FAST!!

THANKS SO MUCH for stopping by today and I hope you have a FABULOUS WEEK!!
COUNTRY HUGS-N-KISSES
LARISSA    =)

Saturday, October 22, 2016

Sorry I'm so slow.

Hello everyone,

I'm back with a belated birthday card.  I'd like to say that I am always on time with birthdays but I'm not so this stamp is perfect.  

This sloth from the Sloth Hang Out set is just adorable and with a sweet little smile on his face.  Makes getting a late birthday card so much better.  


I stamped the image on to some white card stock and I coloured him in with my copics.  I fussy cut him out and set him aside.

I used a piece of light weight grey paper I have in my stash and added it to an A2 size card base.  I then die cut two frames with a rectangle frame die and popped them up with foam tape and added them to the card.

Of course in true Coralynn style I forgot to stamp the sentiment before adding the frames so I stamped it with black ink and added the little leaves around the card to finish it off.

Thanks so much for stopping by, see you again soon.

Coralynn  :)


Friday, October 21, 2016

Hope Your Birthday Was Happy

Good morning everyone and happy Friday! It's Cassie here with another card for you. I'm using the Sloth Hang Out stamp set. I love this cute little sloth! He is ADORABLE! I am the worst about sending cards out on time, so when I saw the cute sentiment I knew this set was going to be one I reached for a lot.
This card was so easy to make. I started by stamping the sloth onto some Bristol Smooth cardstock. I used my Zig Clean Color Real Brush markers to color him in. Next I die cut the circle with stitching out of another piece of Bristol Smooth cardstock.
I have a scalloped die that fits perfectly in the circle so I colored the scallops in with my Zig markers to match the green on the leaves. It gave a great pop of color.


To finish the card I stamped the sentiment in some black ink. That's it for today's card! I hope you enjoyed it. Have a great weekend and I'll see you again soon with another card!

Thursday, October 20, 2016

Altering Your Stamps featuring Sloth Hang Out

Happy Thursday, friends!  It's Tara and today I am back with an adorable project featuring the brand new Sloth Hang Out stamp set from Mint Owl Studio.


I wanted to share how you can take a stamped image and alter it to create a completely different look.  This sweet little sloth comes hanging on a branch but by cutting him out and away from the branch I was able to hang him on the frame on the front of my card!  How much fun is that?


This is a simple card design that packs a big punch by making that cute critter a part of the layout!


Thanks so much for stopping by today!  I will see you again soon!  Bye!


Wednesday, October 19, 2016

And A Happy New Year

Hello!!!  It's Lisa here with you today and aren't you just loving the newly released stamp sets?!  I sure am!  Today I'm sharing a pretty little Christmas card with you that uses the Cardinal Greetings Stamp Set...


To create this card I started by stamping the bough image all the way around a panel in various green inks.  I then went over the panel with Tumbled Glass Distress Ink and die cut the bottom edge.  Next I die cut a star and stamped my sentiment in the center of it.  I finished it all off with some blue sequins.

This card was super easy and could be used for mass production purposes.  Feel free to share with us what you are creating with your Mint Owl Studio Goodies on any of our social media sights, or by tagging us on your own sites!

Happy Crafting!
Lisa

Tuesday, October 18, 2016

Seasons Greetings

Good morning, all! It's Cassie and I'm back with another winter card today. I'm so in love with the holiday products that have been release by Mint Owl Studio recently. Let's get to the card! I used Cardinal Greetings, Trim The Trees, and the Christmas Quilt Stencil. Here's the card:


I started by taping my stencil over the card base and applying my VersaMark over it. Then I poured two different colors of embossing powder over the panel. The trick to get them no contaminated with each other is to pour one at a time and put back into their container before starting the next one. Once that was heat embossed and cooled I used my ink blender and Cracked Pistachio ink to add some color behind the embossing. I splattered the background with white paint and water so that it had a little texture. Next I stamped the branch and three ornaments onto some Neenah Solar White cardstock and used my Copics to color them in. I wanted the ornaments to match the whole card so I used grays, reds, and mint.


 Then I took the sentiment "season greetings" and heat embossed that on some black cardstock. I cut it down and applied it to the card front with foam tape.  I drew in lines for the ornaments so it looked like they were hanging from the branches.

That's it for me today! I hope you liked the card. Be sure to check out the other new products that released this month. There's a lot of fun new stamps to use for your holiday cards and projects. Thanks for stopping by and I'll see you soon with another card!

Monday, October 17, 2016

Belated Birthday Sloth Card!! =)

Hello Mint Owl Studio Friends!!
Laissa here today with a FUN Bleated Birthday Card using the New Sloth Hang Out Stamp Set just released for October!! SQUEAL!! Isn't this just the Cutest Image!! I LOVE LOVE LOVE thatyou can do SO MUCH with it!! I Stamped and Embossed the Images!! Then I watercolored them using my Zig Clean Color Markers!! I then mounted it onto some Brown Plaid Patterned Paper and added some Wooden Embellishments to finish it off!!
THANKS SO MUCH for stopping by and I hope you feel INSPIRED!!
Have a FABULOUS WEEK!!
COUNTY HUGS-N-KISSES
Larissa    =)

Saturday, October 15, 2016

Happy Birthday

Hello wonderful crafting friends!  It is Lisa here with you today and I am sharing a bright and fun Birthday card with you today...


To create this card I started by stamping and masking the donut and cupcake images from the Sweet Treats Stamp Set and coloring them in with Copic Markers.  I added the sentiment from the new  Snarky Birthday Sentiments stamp set I then die cut the edge of this panel.  Next I used the Sprinkles Stencil on pink paper with white pigment ink.  I love the way this turned out!  Once everything was dry I layered my panels onto my card base, and finished it all off with a bow and some sequins.  I also used the Snarky Birthday Sentiments stamp set on the inside saying, " Treat Yo' Self" hehehe!  Love it!

Thank you so much for stopping by today and Happy Crafting!
Lisa

Friday, October 14, 2016

NEW RELEASE BLOG HOP!

Hello!

It's time for our October release!  We have three new stamp sets and one new stencil!  We don't quite have the matching dies yet, because there was a mix-up.  We will have them within a couple of weeks though!  


Hop Order:

We're also giving away the entire new stamp release!  Want to know how to win?  All you have to do is comment on this blog and each of the blogs on the hop.  The winner will be randomly chosen from one of the blogs, so the more blogs you comment on, the better your chance is to win!  Good luck!

Wednesday, October 12, 2016

INTRODUCTION: Cardinal Greetings!! =)

Hello Mint Owl Studio Friends!!
Larissa here today to Introduce the New Cardinal Greetings Stamp Set!!
I LOVE LOVE LOVE the Images and ALL of the possibilities wit this New Set!!
Lets take a look at the New Set!!

I've made a SWEET Scene Card for today!!
I Started by Stamping, Masking and Embossing the Cardinal and the Tree Branch in the Center of my Card!! Then I Masked both the Cardinal and the Tree Branch and Stamped the Pine Branches over the top using some Different Green Inks!! I then went over them with Water to create the Watercolored look and also Watercolored the Sky!! I wanted it to look like it was Snowing so I covered everything with my Anti-Static Powder Tool after it was Dry and Heat Embossed the Snow Flakes and Snow Dots using White Embossing Powder!! I wanted some Glitter to cover the Snow so I added some Liquid Glue and added the Glitter to the Branch and the Snow Flakes!! I added some Red Glitter to the Berries and I LOVE the way it looks!! For some added texture I Die Cut a piece of Watercolor Paper and added it to the bottom of the Card!! I added a Wiggle Eye for some added FUN!! I Stamped and Embossed the Sentiment and my card was done!! I HOPE you feel INSPIRED and don't forget to come back tomorrow for another Introduction and Friday for a Blog Hop and a Chance to WIN the ENTIRE Release!! SQUEAL!! You WON'T WANT to MISS it!!
THANKS SO MUCH for stopping by today and I hope you have a FABULOUS WEEK!!   =)
COUNRY HUGS-N-KISSES
LARISSA    =)

Tuesday, October 11, 2016

INTRODUCTION - Snarky Birthday Sentiments

Hello there! 

I'm here to introduce our new Snarky Birthday Sentiments stamp set.  I absolutely love these sayings.


For my card I used one of our new stencils (*sneak peak) and added willow coloured dye ink using a blending tool to an A2 sized card panel.  

I had this little fella sitting on my desk from a previous project and he was just hoping to be put on a card...so I did!  


I used a banner die to cut out olive card stock and added the sentiment with black ink.  I took the panel and used a rectangle die of the same size and cut it out adding it to the card base.  I then added the banner with liquid adhesive so I could move it around to make sure it was straight. Once that was done I added the little owl with foam tape and called it a day.


Thanks for joining us and stay tuned for more new products tomorrow.  You'll love what's coming!

Coralynn  :)


Saturday, October 8, 2016

A party without ice cream...

 Hi everyone,

I'm back with a yummy card for you today.  As much as I love fall and fall cards I also love ice cream and thought I would make a card with the Sweet Treats stamp set and Sprinkles stencil.


I started out with a piece of white card stock and added three colours to some embossing paste.  I used the Sprinkles stencil and added each colour diagonally across the panel. I set that aside to dry.


I then stamped the candy with black copic safe ink and coloured them in and fussy cut them leaving a very small white border.  Mainly because I need to practice my fussy cutting and can never get a nice even edge.  But that's just our little secret.  ;)


I cut out two circles from vellum and on the smaller one I stamped and heat embossed the sentiment with cracks me up.  I cut down the embossed panel and added the circles and popped up the candy with foam tape.

That's it for me.  Hope you get some crafty time this weekend!

See you again soon.

Coralynn  :)