Showing posts with label die cutting. Show all posts

Tuesday, December 6, 2016

Have A Sweet Christmas

Good morning, and happy Tuesday! I hope you're all having a great week. It's Cassie here, and I've got another holiday card t share with you. I had made this one a while back and just realized that I never posted it.

I started by stamping the branch from the Cardinal Greetings onto a piece of Bristol Smooth cardstock. Then I took my Zig Clean Color Real Brush Markers and drew over the branch and pine needles. I also stamped the donut from Sweet Treats three times below the branch and colored them in with my Zig Markers. The background was made using the markers too.
I die cut a banner from some more Bristol Smooth cardstock and heat embossed a sentiment I made using two different sets. Half of it comes from the Sweet Treats set, and the other part is from the Cardinal Greetings set. I ink blended Lucky Clover Distress Ink over the banner and splattered it with water to make the splotches.
I attached the banner with foam tape, added some glossy accents and white gel pen sprinkles to the donuts and the card was complete!

I hope you guys enjoyed this card! It was a fun one to make. Thanks so much for stopping by and I'll see you  again soon with another card!

Monday, December 5, 2016

3-D Holiday Gift Tags!!

HELLO MINT OWL STUDIO FRIENDS!!
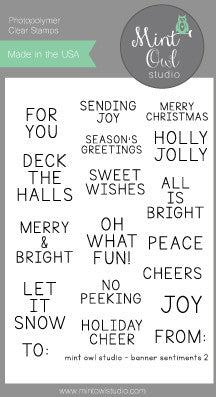
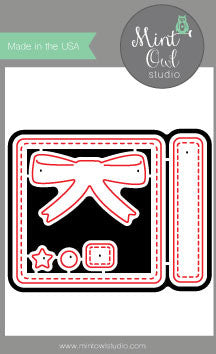
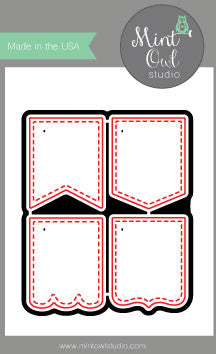
Larissa here today to share some Sweet 3-D Holiday Gift Tags with you!! The Holiday's are FAST approaching and if you're like me, you're getting those Gifts Wrapped and Cards ready to mail!!?? I thought it would be FUN to make a Set of Gift Tags with a BEAUTIFUL 3-D Bow!! I just LOVE LOVE LOVE to add Dimension to my Tags to make them come alive!! I've used the Banners Sentiments 2 Stamp Set along with the SWEET Bow from the Packaged Pretty Die Set and the Mini Banner Die Set!!
 Banner Sentiments 2  Packaged Pretty  Mini Banner Die Set
I Die Cut all of my Banners and Stamped and Embossed the Sentiments and the To: and From: on all of them first!! Then I Die Cut 2 Bows for each Tag so that I could Layer them together to make a 3-D Bow and added a Rusty Bell in the Center of the Bows!! I Die Cut some Tags from some Double Sided Patterned Papers and then adhered the Banners and the Bows onto each of the Tags!! Next I added the Burlap Twine and my Tags were done!! I hoe you find these INSPIRING an that maybe you'll make your own 3-D Gift Tags for those Holiday Packages you have to Give!!
THANKS SO MUCH for stopping by and I hope you have a FABULOUS WEEK!!
COUNTRY HUGS-N-KISSES
LARISSA   =)

Friday, December 2, 2016

Holiday Greetings


Hello everyone,

I'm back with another holiday card and it was pretty easy to put together.  This would be a good one to mass produce.

I used the reindeer from the Deer Santa stamp set and I just stamped out his head and coloured him in with my copics.  I then fussy cut him out and went around the edges with a black marker to them up.


 I then cut out the circle in the middle of the card and after I used a triangle die to cut out the panel.  I then used a piece of grey kraft card stock cut out another panel with the scalloped rectangle and added it to an A2 sized card base. I cut out a little piece of patterned paper and added it behind the circle.  I then popped up the front panel with fun foam and added foam tape to the reindeer.  And as usual I forgot to stamp my sentiment.  So luckily I used fun foam so it stamped nicely.  I used the Cardinal Greetings stamp set with black ink.


To finish off the card I added some sequins from the Mint Owl Mix.

Thanks for stopping by, see you again soon!

Coralynn  :)

Saturday, November 26, 2016

Merry Christmas Tag

Hello everyone,

Happy "day after" Thanksgiving!  I hope you were able to get lots of turkey and time with family.

I have a tag to share with you today.  As nice as it is to have a card for each give, sometimes it's fun to add a special tag instead.  

I started out with stitched tag stax from MFT and cut out the first panel from Neenah desert storm card stock and then another tag the next size up from green card stock from my stash. 


I used the pine branch from the Cardinal Greetings stamp set and stamped it with green ink with first and second generation stamping to give it some depth.  I added the berries with versamark ink and heat embossed them with red embossing powder.  I did the same thing with the sentiment.  

I added the smaller tag to the bigger one with foam tape and as usual I forgot to add the hole at the top for the twine.  So I did this very carefully and added it with my crop-o-dile and added some Lawn Fawn lawn trimmings in gold.  You can finish off the tag by adding a TO and FROM to the back. 


Thanks for stopping by, see you again soon!

Coralynn  :)

Wednesday, November 16, 2016

Happy Birthday

Hello everyone,

Coralynn here with a birthday card for you today.  

The MOS stamp sets I used for today's card are Happy Moments and Love for Mom.  

I stamped the flower on white 110# card stock with intense black ink and coloured them in with my copics.  I fussy cut it out with my scissors and went along the edges with a black Memento marker to clean up the image. 


I created the background with a candy striped background stamp and used grey and purple inks.  I used a rectangle die to cut out the plaid panel along with a piece of vellum.  

I stamped the sentiment on the vellum with Versafine Onyx black ink and heat embossed with the Wow black embossing powder.  I added the flower with the foam tape to the vellum and I adhered the vellum panel to the plaid panel with liquid adhesive.  


I coloured the scalloped frame with the same purples as the flower so they would match and added it to the rest of the panel. I then adhered everything to the card base and added a few finishing touches with enamel dots and a lot of sparkle pen to the flower.


Thanks for stopping by, see you again soon!

Stay crafty  :)
Coralynn

Saturday, October 29, 2016

Deck the Halls

 Hello everyone,

I'm back with a Christmas card from our Trim the Tree stamp set and the Christmas Quilt Stencil.

As I was creating this card my daughter wanted to help so she fussy cut one of the boughs and I added it along with the others.  She will be tickled that it made it to a blog post!


I stamped and coloured in the ornament and pine boughs black in and coloured them in with my copics.  I fussy cut these out and for the ornament, I added glossy accents to make it shiny.

For the front panel, I used the Christmas Quilt Stencil and blended in Candied Apple and Lucky Clover distress inks.


To create the card base I die cut two panels and scored one of them on the top at about 1/4 down and adhered it to the front panel making this a shaped card.  

I cut out a smaller panel and stamped the sentiment with black ink and popped it up on foam tape.  I then added the boughs and ornament. 

Thanks for stopping by, see you again soon. 

Coralynn  :)


Saturday, October 22, 2016

Sorry I'm so slow.

Hello everyone,

I'm back with a belated birthday card.  I'd like to say that I am always on time with birthdays but I'm not so this stamp is perfect.  

This sloth from the Sloth Hang Out set is just adorable and with a sweet little smile on his face.  Makes getting a late birthday card so much better.  


I stamped the image on to some white card stock and I coloured him in with my copics.  I fussy cut him out and set him aside.

I used a piece of light weight grey paper I have in my stash and added it to an A2 size card base.  I then die cut two frames with a rectangle frame die and popped them up with foam tape and added them to the card.

Of course in true Coralynn style I forgot to stamp the sentiment before adding the frames so I stamped it with black ink and added the little leaves around the card to finish it off.

Thanks so much for stopping by, see you again soon.

Coralynn  :)


Tuesday, October 11, 2016

INTRODUCTION - Snarky Birthday Sentiments

Hello there! 

I'm here to introduce our new Snarky Birthday Sentiments stamp set.  I absolutely love these sayings.


For my card I used one of our new stencils (*sneak peak) and added willow coloured dye ink using a blending tool to an A2 sized card panel.  

I had this little fella sitting on my desk from a previous project and he was just hoping to be put on a card...so I did!  


I used a banner die to cut out olive card stock and added the sentiment with black ink.  I took the panel and used a rectangle die of the same size and cut it out adding it to the card base.  I then added the banner with liquid adhesive so I could move it around to make sure it was straight. Once that was done I added the little owl with foam tape and called it a day.


Thanks for joining us and stay tuned for more new products tomorrow.  You'll love what's coming!

Coralynn  :)


Saturday, October 8, 2016

A party without ice cream...

 Hi everyone,

I'm back with a yummy card for you today.  As much as I love fall and fall cards I also love ice cream and thought I would make a card with the Sweet Treats stamp set and Sprinkles stencil.


I started out with a piece of white card stock and added three colours to some embossing paste.  I used the Sprinkles stencil and added each colour diagonally across the panel. I set that aside to dry.


I then stamped the candy with black copic safe ink and coloured them in and fussy cut them leaving a very small white border.  Mainly because I need to practice my fussy cutting and can never get a nice even edge.  But that's just our little secret.  ;)


I cut out two circles from vellum and on the smaller one I stamped and heat embossed the sentiment with cracks me up.  I cut down the embossed panel and added the circles and popped up the candy with foam tape.

That's it for me.  Hope you get some crafty time this weekend!

See you again soon.

Coralynn  :)


Tuesday, September 27, 2016

Dear Santa

Happy Tuesday, everyone! It's Cassie back with another card. Today's card came to me as I was making another card and I ran with it. I decided to take the sentiments from the new Dear Santa set and make them into a funny little holiday card for someone who-*gasp*-might be on the naughty list!

Let's take a look at the card!

This card was pretty darn simple to make, and it is another non-tradition holiday color combo like I've been so into lately. I started by stamping the pine branch from the Trim the Tree all over a piece of Bristol Smooth cardstock. Then I took my Zig Clean Color Real Brush markers and colored in the branches and background. I went simple with the colors so that it wasn't too busy. When the panel was dry I splatter black and white paint over it-a look I've been loving lately!


Then I die cut some paper to write my letters. You can hardly tell in the photos due to the lighting, but I did use a T-ruler to give the paper blue horizontal lines and a pink vertical line on the left side. Then I took the sentiments from the Dear Santa set and stamped the "Dear Santa" at the top of each letter. I did cut the sentiment apart, as the "is it too late to be good?" was attached, but you don't have to if that makes you cringe. You can just mask off the part that you don't want to stamp. Part of the reason I did cut mine apart was that I wanted the words to fit nicely in the blue lines I had drawn in, but again-you don't have to do that. I continued by stamping the rest of the sentiments. I wanted it to look as though someone had started a couple letters and finally settled on the last one, so I crossed out the first two letters contents with my ruler. I popped the letters up with some foam tape and added a couple of white enamel dots, and that's it for this card!

Thank you so much for joining me today! Do you think you'll make the nice list this year?! Or do you know anyone who would have to write a couple letters like this? I know I do! :) I hope you liked the card. Have a great week, and I'll see you again soon with another card!

Tuesday, September 20, 2016

Let It Snow

Good morning Mint Owl friends! It's Cassie here, with another card to kick us all into holiday crafting gear. Today I'm combining a new set with an old set and loving the results. I started by pulling out my Banner Sentiments 2 stamp set to use with my Mini Banner Die set. I love that the sentiments that can be used with these dies keeps growing!

To start out I die cut one of each of the banners. I love the size of these because they fit so well across a card panel. I also pulled out my Dear Santa stamp set because it has a few cute little images that fit well in the banners. I stamped each of the images on a banner with VersaMark and then used white embossing powder and heat set them. To make the embossed images pop I added color to the banners with my ink blending tool and Distress Inks. I've been on a non-traditional Christmas color kick so I picked Lucky Clover, Blueprint Sketch, Cracked Pistachio and Peacock Feathers.
For the background I also used Distress Inks to create a snowy night. I started by die cutting a stitched rectangle out of some Bristol Smooth cardstock. Then I pulled the two different size dots from the Trim The Tree set. Using the VersaMark and white embossing powder I stamped the dots all over the panel to make snow. Then I splattered the panel with water to make it look like smaller snow flakes. I'm from Minnesota so trust me-I'm an expert on snowfall! :) I used Broken China and Blueprint Sketch again to make the sky.

Finally I poked holes in the banners and strung some aqua cord through. I taped it on the back and attached it to my card base. And now I've got another card to send for the holiday season! How many cards do you have ready for the winter? Thanks so much for joining me today, and I'll see you again soon with another card!

Saturday, September 17, 2016

A Child is Born

Hello everyone!

I'm back with another card with this months release which is available today in the shop

For my card I used the "Away in a Manger" stamp set along with the "Christmas Quilt" stencil.  I used what I'm calling the reverse stencil technique with I did with my previous card.  This was the second stamping to use up the ink left of the stencil. I then took some watercolour paints and coloured in the background.  


I used a circle from my stash along with a banner die cut from black card stock. I heat embossed the sentiment with white embossing powder and adhered it to the front panel. I then coloured and fussy cut Baby Jesus and popped it up with foam tape.  To finish off the card I added some Sparkle pen to the watercolour panel but you can't see it in these pictures.


We hope you'll head over to the shop to treat yourself with a few, or the entire release for this month!

Thanks for stopping by, see you again soon.

Coralynn  :)

For unto us a child is born. Card share.

Hello everyone!

I'm back with another card with this months release which is available today in the shop

For my card I used the "Away in a Manger" stamp set along with the "Christmas Quilt" stencil.  I used what I'm calling the reverse stencil technique with I did with my previous card.  This was the second stamping to use up the ink left of the stencil. I then took some watercolour paints and coloured in the background.  


I used a circle from my stash along with a banner die cut from black card stock. I heat embossed the sentiment with white embossing powder and adhered it to the front panel. I then coloured and fussy cut Baby Jesus and popped it up with foam tape.  To finish off the card I added some Sparkle pen to the watercolour panel but you can't see it in these pictures.


We hope you'll head over to the shop to treat yourself with a few, or the entire release for this month!

Thanks for stopping by, see you again soon.

Coralynn  :)

Saturday, September 10, 2016

Another Year Wiser

Hello everyone,

I'm back with a card I created with this adorable Outrageous Owls stamp set.

I started out with the negative pieces from a background die that cut out vertical stripes so I thought I would put them to good use. I took some warm grey inks and blending them from dark to light then I adhered them to the card base.


I coloured in the cool owl and branch with warm grey copics and my new favourite combo (E40, E43, E44 & E49) and he looked like he needed googley eyes so on they went.  I coloured in the heart with R11.


I cut out a circle from a circle die and added the sentiment with Versamark Onyx black ink and added clear embossing powder.  I then added on the owl and branch to the circle and then added tiny dots of glue strategically placed behind the sentiment and images. To finish off the card I added a few grey gems and added some sparkle to the heart on the branch.


Thanks for stopping by, see you again soon!

Coralynn  :)

Saturday, August 13, 2016

Love You!

Hello everyone,

Coralynn here and I'm back with a set of cards for you.  This is an oldie but a goodie.  I love the elegance of this set and thought I would try a new to me technique of added a contrasting colour around the image to pop it off the card.  


I used the "Love for Mom" set and stamped with Versamark and heat embossed with white embossing powder on to water colour card stock.
I then die cut the front panel and added colour with my Zig clean colour markers with an aqua brush.


I added the sentiment with a black pigment ink and used clear sequins from the Mink Owl sequins mix. I popped the front panel on to a pink and yellow piece of card stock and adhered that to the card bases.

That's it for me, thanks for stopping by.

Coralynn  :)


Saturday, August 6, 2016

Sea You Soon

Hello everyone,

It's Coralynn here.  I hope you are having a wonderful summer.  Today was a beautiful day and it would have been a perfect day to go sailing.  Since I don't, I thought I would make a card about sailing instead.

I also have some fun pictures of my kitty, BooMan as we call him, helping me out with taking pictures of my card. So stay tuned till the end of my post.

Today was a beautiful day and it would have been a perfect day to go sailing.  Since I wasn't able to, I thought I would make a card about sailing instead.

I started out with an A2 card base and I used distress inks to add the water.  I then heat set it so that the embossing powder would only stick to the embossing powder. I used the boat, waves and shells from the Beach Babes stamp set and added them to the card with SSS Clear ink.


I cut out the front panel with a story book die and popped it up over the images and the added some die cut clouds from my stash. I added the sentiment with black ink and as usual I always forget to add it till the end.  This time I was lucky as the foam tape was thick enough under that front panel for me to stamp it without messing it up.  


Okay, so I just had to share this with you all.  My BooMan (my kitty) often hops up on my table and lays down with me while I craft.  Well today he decided to do so while I was taking pictures of my card for this post.  Needless to say he doesn't really care about what is on my desk at the time; he just jumps up and walks around looking for a spot to lay down.  Love having him with me though.  


Thanks for stopping by, see you again soon!

Coralynn   :)