Wednesday, November 30, 2016

His and Her Gift Card Holders


Hello wonderful crafty friends!  It is Lisa here with you today sharing some cute his and her Holiday Gift Card Holders.  I don't know about you, but I tend to have quite a few gift cards to give out during the Holidays and I always want something cute to give them in, so the recipient still feels like they have something to open, you know what I mean?  And I think these little guys are just the thing...


To decorate my gift card holders I used the Packaged Pretty Die Set for the front with Fancy Pants Patterned Paper.

For the back of my gift card holders I used the Mini Banner Die Set and adhered them on their side before stamping my sentiments from the Banner Sentiments 2 Stamp Set.

Yes, this is a super easy project, but isn't that just what we need during the Holidays when we can't seem to find enough time for anything?  Love it!

Happy crafting and thanks so much for stopping by!
Lisa

Tuesday, November 29, 2016

Dear Santa,

Good morning everyone! It's Cassie here, and I feel like it has been forever since I have posted a card, which is silly since I was just here last week. Thanksgiving and the long weekend were both amazing, and I hope yours was as well. I'm here with a bit of a different holiday card t share with you.
I made this cute and non-traditional colored card for the cutest new addition to our extended family. First Christmas's are so exciting, and having another little cousin has given me a new look on card making. For this card I stamped the dump truck from the Under Construction stamp set on some Neenah Solar White paper. Then I took a pencil and drew in a string of lights on the top of the truck. I love the idea of going through my MOS stamps and picking images that could be presents you'd find wrapped up at the holidays, and this truck would be perfect for that! I used a Copic Multiliner to draw in the lights and string, because I knew I wanted to color the image in with my Copics. Once I had colored it in I fussy cut the image out.
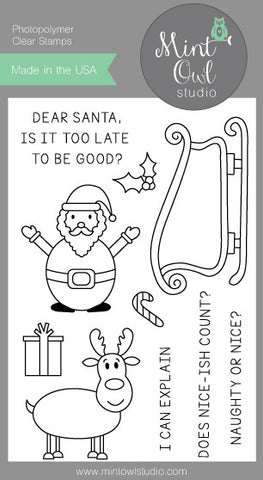
I stamped the present from Dear Santa all over the bottom half of a piece of Bristol Smooth cardstock with a waterproof black ink. Then I took my Zig Clean Color Real Brush Markers and colored them in to match the truck and lights. It's a very different color combo-especially for a holiday card, but I think it works. I splattered white paint over the top of the presents and set the piece aside to dry. Once it was dry I attached it to the bottom of my card base.
I took another piece of Bristol Smooth cardstock and cut it down to fit the card base. I die cut a stitched scalloped edge on the bottom so my presents would show and stamped it with the "dear santa," sentiment from the Dear Santa set. I attached it to the top of the card base. My last step was to die cut a stitched circle to highlight the truck. I scribbled a blue Zig marker on it and evened it out with some water. Once it was dry I attached it above the sentiment with some foam tape and did the same with the truck. I added a little sparkle to the lights with my Spectrum Noir Shimmer pen, and the card was finished!

Thanks so much for stopping by today! I hope you enjoyed my card, and I'll see you again soon with another one!

Monday, November 28, 2016

Merry Christmas & a Happy New Year Shaker Card!! =)

Hello Mint Owl Studio Friends!!
Larissa here to share a FUN Holiday Shaker Card!! I've used the
Cardinal Greetings Stamp Set!! 
Cardinal Greetings
I Stamped and Embossed the images onto Distress Watercolor Paper!! I then Watercolored them using Distress Inks and then Fussy Cut out the Cardinal and the Branch!! I wanted some Pine Trees so I used Distress Inks and Stamped them then coated them with some Clear Embossing Powder!! I Die Cut a Stitched Circle for the Shaker Window and added some Acetate and Fun Foam!! I used the Honey Bee Stamps Poinsettia Sequin Mix for my Shaker Elements and then added some Nuvo Red Slippers Drops for the Berry's and some Nuvo Morning Dew Drops for the Beak!! I LOVE LOVE LOVE the way it turned out!!
THANKS SO MUCH for stopping by and I hope you ENJOY some Cyber Monday Shopping!!
We're having a HUGE SALE so don't forget to check it out!!

Have a FABULOUS WEEK!!
COUNTRY HUGS-N-KISSES
LARISSA    =)


Saturday, November 26, 2016

Merry Christmas Tag

Hello everyone,

Happy "day after" Thanksgiving!  I hope you were able to get lots of turkey and time with family.

I have a tag to share with you today.  As nice as it is to have a card for each give, sometimes it's fun to add a special tag instead.  

I started out with stitched tag stax from MFT and cut out the first panel from Neenah desert storm card stock and then another tag the next size up from green card stock from my stash. 


I used the pine branch from the Cardinal Greetings stamp set and stamped it with green ink with first and second generation stamping to give it some depth.  I added the berries with versamark ink and heat embossed them with red embossing powder.  I did the same thing with the sentiment.  

I added the smaller tag to the bigger one with foam tape and as usual I forgot to add the hole at the top for the twine.  So I did this very carefully and added it with my crop-o-dile and added some Lawn Fawn lawn trimmings in gold.  You can finish off the tag by adding a TO and FROM to the back. 


Thanks for stopping by, see you again soon!

Coralynn  :)

Wednesday, November 23, 2016

Black Friday Sale

Hello!

We are having a HUGE Black Friday - Cyber Monday Sale that starts today!  Take 25% off your entire order with the coupon code BLACK25.


All orders will start shipping next Tuesday, November 29th.  Happy Shopping!

Holiday Greetings!

Hello!  It is Lisa here with you today and I am so excited to share this fun and shiny Christmas card with all of you...


To create this card I started by laying the Christmas Quilt Stencil over Black cardstock and applying versa mark ink.  I then lifted the stencil and added some Wow! Embossing Powder in Cha Cha Cha. After this was heat set I adhered it to a panel of gold foil cardstock.  Next I stamped and embossed both the bird and sentiment from the Cardinal Greetings Stamp Set with a gold embossing powder.  I then adhered these to my card and ta da!

These are not typical colors I think of when creating Christmas cards, but I think it works well and really creates a rich look.

Thanks so much for stopping by and feel free to share what you are creating with your Mint Owl Studio goodies on any of our social media sites!
Happy Crafting!
Lisa

Monday, November 21, 2016

Merry Christmas

Good morning everyone! It's Cassie here, and I've got a holiday card to share with you today. I made this card using the Cardinal Greetings stamp set. This is such a great set, because it really has everything you need to make many different holiday cards. I've made a bunch of different cards using it this year!

I started by stamping one of the branches on some khaki cardstock. It's such a fun look to have a light colored cardstock instead of just white. I colored in the branch and berries using my Copic markers.
Then I stamped the sentiment in VersaMark and heat embossed white powder on it. I colored the bird in with my Copics and cut it out. I attached it with some foam tape so that it looked like the bird was sitting on the branch. I stamped the snowflake all over the background in VersaMark ink to make a tone on tone look. Then to make it look even more snowy I drew little white dots with my gel pen. To finish it off I added some Glossy Accents on the berries and attached it to a card base.

I hope you liked the card today! I'm going to have to try another card with a colored base again soon, because I loved how it turned out. I hope you're having a great week! Thanks for stopping by, and I'll see you again soon with another card!!

Interactive Construction Scene Card!!


HELLO Mint Owl Studio Friends!!
Today I have a FUN Interactive Card to share using the "Under Construction" Stamp Set and I LOVE LOVE LOVE the way it turned out!! I started by Stamping and Embossing the Images onto Distress Watercolor Paper!! Then I Watercolored the Images and my background with Distress Inks!! I wanted the Card to feel like the Excavator was Loading up the Dump Truck so I created a Slider with a Hole in the Center so it looks like the Hole was created by the Digging!! I Then added the Images onto some Penny's for my Sliders and then added the Construction sign in the Back of the Dump Truck!! I LOVE LOVE LOVE the way it turned out and hope you do too!! 
                           
THANKS SO MUCH for stopping by and I hope you have a FABULOUS WEEK!!
COUNTRY HUGS-N-KISSES
LARISSA    =)

Saturday, November 19, 2016

Naughty or Nice?

Hello!  It's Lisa here with you today and I have a cute little Christmas tag to share with all of you today...


To create this tag I used the super cute Dear Santa Stamp Set.  I just love this little round Santa and the Reindeer in it too!  Anywho, I started by die cutting my scallop and circle shapes. I then stamped the Santa, present, and sentiment onto the kraft cardstock with Memento Ink.  I used my Prismacolor pencils this time to color Santa and the present in ( I also have to mention that my daughter helped pick out my color pallet, I'm very scientific like that hehehe! ).  Next I used white enamel gel at the top, that I was hoping to have represent snowflakes, but when it dried it looked clear.  So instead it just added some texture to the background, and I have to say it has kind of grown on me and it doesn't look too bad.  To finish the tag off I tied the top off with red and green twine.

Thanks so much for popping by today and don't forget to share your Mint Owl Studio projects with us on any of our media feeds!
Happy Crafting!
Lisa

Wednesday, November 16, 2016

Happy Birthday

Hello everyone,

Coralynn here with a birthday card for you today.  

The MOS stamp sets I used for today's card are Happy Moments and Love for Mom.  

I stamped the flower on white 110# card stock with intense black ink and coloured them in with my copics.  I fussy cut it out with my scissors and went along the edges with a black Memento marker to clean up the image. 


I created the background with a candy striped background stamp and used grey and purple inks.  I used a rectangle die to cut out the plaid panel along with a piece of vellum.  

I stamped the sentiment on the vellum with Versafine Onyx black ink and heat embossed with the Wow black embossing powder.  I added the flower with the foam tape to the vellum and I adhered the vellum panel to the plaid panel with liquid adhesive.  


I coloured the scalloped frame with the same purples as the flower so they would match and added it to the rest of the panel. I then adhered everything to the card base and added a few finishing touches with enamel dots and a lot of sparkle pen to the flower.


Thanks for stopping by, see you again soon!

Stay crafty  :)
Coralynn

Tuesday, November 15, 2016

Interactive Holiday Gift Tags!! =)

HELLO MINT OWL STUDIO FRIENDS!!
Larissa here today to share a SWEET Gift Tag!! The Holiday's are approaching FAST and how FUN is it to use those Products that you may already have on hand to use for your Holiday Gift Giving too!!?? I LOVE LOE LOVE being able to use my products for making my own Holiday Gift Tags!!
I'm using the AWESOME Dear Santa Stamp Set and the Banner Sentiments 2 Stamp Set for my Projects today!!
Dear Santa Banner Sentiments 2
                           
When I make Gift Tags, I like to do them assembly Line Style as  feel I can get more made in a faster amount of time!! So I Stamped and Embossed ALL of my Images and Sentiments first onto some Distress Watercolor Paper!! Then I used my Zig Markers to Watercolor them!! I used a FUN Interactive Tag Die and I LOVE LOVE LOVE the FUN Design!! So I adhered the Tags together and my Tags were done!! I made this FUN Painted Mason Jar too to use for some YUMMY Treats!! How EASY and FUN for giving during the Holidays to BRIGHTEN someone's day!!?? I hope you're INSPIRED to make some for you own Holiday Gift Giving needs!!?? If you do I hope you'll share as we LOVE to see what you create using the AMAZING Mint Owl Studio Products!!
THANKS SO MUCH for stopping by and I hope you have a FABULOUS WEEK!!
COUNTRY HUGS-N-KISSES
LARISSA   =)

Monday, November 14, 2016

Holiday Cheer

Good morning everyone! I hope you are all having a great Monday. It's Cassie here and I've made a cute and simple holiday card to share with you! Today I've used the Banner Sentiments 2 stamp set, Coffee Craze  stamp set, and a small die from the Packaged Pretty die set.

I started by stamping two of the cups with whipped cream on top onto some Tim Holtz water color paper. I had die cut the paper with a stitched rectangle die. Because I wanted one in front of the other I masked the red cup so that it would look as if the green cup was behind it when I stamped it. I colored both cups in with Zig Clean Color Real Brush Markers. I made sure they were completely dry and stamped the two sentiments, both of which were from the Banner Sentiment 2 set, in VersaMark ink and heat embossed them with white embossing powder.
Then I took the dot from the Packaged Pretty die set and die cut a bunch of dots from the panel of my card. This was a little time consuming, and it is difficult to see in the videos, but it looks so fun in real life, and I love the snowy look it gives! I also die cut the bow from the set and colored it with the same green as the cup. I added some little dots to it to give it a little interest.
I attached another piece of water color cardstock to the back of the card panel and put it so the textured side of the paper was up to give it a little contrast to the smooth side I had picked to do my stamping on. The last step was a little glitter pen on the whipped cream and bow, and attaching it to a card base!

That's all for me today! I hope you enjoyed this fun card, and I'll see you again soon with another one!

Saturday, November 12, 2016

Dear Santa, is it too late?

Hi everyone,

I'm back with a Christmas card for you today and I chuckle every time I see this sentiment so I thought I would add it to my card. 


I cut a piece of patterned paper and cut it out with a stitched rectangle die and cut out a couple of snow drifts with some stitched hills die and cut them out of white card stock.  I added the sentiment to one of the hills and added them everything to the card base with liquid glue and foam tape.


I used the rein deer, sleigh,candy cane, present and the holy from the Dear Santa set and coloured them in with my copics and added some glitter to the sleigh.  You can't have a Christmas card without some glitter. I then added three enamel dots to finish off the card.


Thanks so much for stopping by, see you again soon!

Coralynn :)

Thursday, November 10, 2016

Non-Traditional Christmas featuring Trim the Tree

Hey all and happy Thursday!  It's Tara and today I am sharing a  project with you all featuring the adorable Trim the Tree stamp set and some non-traditional Christmas colors. I just love pink and teal  holiday themes and thought it would be fun to play with on this project!


This type of stamping is fabulous for when you want to crank out a card really quickly!  My family has been busy of late and I had limited time to bust this out but this technique makes it really easy to create a beautiful card in no time!  I used Lawn Fawn inks to stamp the ornament images on some Neenah 110 lb cardstock.  To get the full colored image I simply used the back of the stamp!  How easy is that?


I added some silver accents to all of my ornaments and paired them with some Lawn Fawn Perfectly Plaid Paper.  I love how this sweet and simple card came out and I love even more that it only took ten minutes to create!  


Thanks so much for stopping by and I will catch you next time!  Bye!

Wednesday, November 9, 2016

One Layer for Christmas

Hello!  It is Lisa here with you today and I'm sharing a fun one layer that gives the illusion of dimension with some embossing.  Check it out...


To create this card I used the Cardinal Greetings Stamp Set, opting to make the small snowflake image the star of my card.  To do this I started by running my cardstock and rectangle die through my diecutting machine, but rather than cut the rectangle out I used the embossing plates and mat to emboss the frame into the card.  This created the perfect line for me to follow when masking off the edges.  I decided it would be easiest to stamp my sentiment first with Versafine ink and then stamp and emboss the snowflake randomly on the rest of the open area.  Once this had cooled off I used Tumbled Glass and Broken China Distress ink to shade in my snowy sky.  The masked were then removed and I added a few splashes of water for more dimension in the background.  To finish the card off I used some blue and gold twine.

Thanks so much for stopping by today and don't forget to join our Instagram Challenge: Texture to put you in the running for a free stamp set of your choice!

Happy Crafting!
Lisa

Tuesday, November 8, 2016

All Is Bright

Hello everyone! Welcome back to Mint Owl Studio! It's Cassie, and I've got a fun card using some older and newer sets today. In Minnesota we've been having really warm weather the last couple of weeks, so it makes it difficult to think that winter is right around the corner, but, in spite of that, my card today is a wintery scene.

 Today I made a cute little 4x4 card using a stitched square die. I love making this small card because it can easily be attached to a gift if need be. I die cut a circle border and Distress Inked a piece of Bristol Smooth cardstock that was cut down to fit behind the circle. I used Candied Apple, and splattered water on it to get a bleached snowy background. I wanted it to be even more blizzard-like so I added some dots with my white gel pen. Then I stamped two of the moose image from the I Moose You stamp set, as well as the tree included in the set.
I colored the images in using my Copics and fussy cut them out. A great old trick to use to make your fussy cut images look even better is to run a black marker along the cut edges. It makes the images look like they were cut out perfectly, even if you're like me and struggle to cut out such detailed images! I also die cut a banner from the Mini Banner Die Set and stamped the sentiment 'all is bright' from the Banner Sentiments 2 set in Versamark. I heat embossed white embossing powder onto the banner. I added color to the banner by ink blended Mowed Grass and Forest Moss Distress Inks onto it.
The last touch was to die cut a simple bow to add to the banner. After that all I had to do was to put everything together! That's it for me today. I hope you're all having a great Election Day! I'll see you again soon with another video!

Monday, November 7, 2016

Deck the Halls!! =)


HELLO Mint Owl Studio Friends!!
I'm up on the Mint Owl Studio Blog!! I wanted to make a FUN Garland/Banner Card!! So I used the AWESOME Mini Banner Die Set and the Sweet Banner Sentiments 2 Stamp Set!! I Created a FUN Watercolored Background that I added some Texture too with some Paint Splatters!! This goes along with the New November Instagram Challenge "TEXTURE"!! I hope you'll play along for a chance to WIN!!

I also added some Stamped, Embossed and Fussy Cut Bows and Holly for some added touches to my Garland/Banner!! The Bows are from the Birthday Bash Stamp Set and the Holly is from the Dear Santa Stamp Set!! I just LOVE LOVE LOVE the way it turned out!!

THANKS SO MUCH for stopping by and I hope you have a FABULOUS WEEK!!
COUNTRY HUGS-N-KISSES
LARISSA     =)

Sunday, November 6, 2016

November Instagram Challenge

Hello!

Welcome to our new monthly challenge!  Instead of hosting it here on the blog, we are hosting it on Instagram!  It seems that so many more people are stepping away from blogging and just putting photos of their cards on social media.  We know it's much easier to do and we just want to see what you are creating!


Rules:
1. Create a card based on the challenge theme.
2. Upload a photo of it to Instagram.  Tag Mint Owl Studio and add the hashtag #moscardchallenge to your post.
3. Look at the other cards with that hashtag and show some love to your fellow card makers!  Let's make this fun!

There is also a prize with each challenge!  One lucky participant will receive a stamp set of their choice.  The winner is random, so all card making skill levels are welcome.

We can't wait to see all of your cards!
Tracy

Saturday, November 5, 2016

Happy Birthday


Hello everyone,

I'm here today with a birthday day card.  I think this iced coffee from the Coffee Craze stamp and die set is the one image that I just can't stop using.  You can colour these in so many ways and it's just too much fun.

I started out with a piece of watercolour paper and I die cut it with a stitched background die and with Picked Raspberry and Aged Mahogany distress inks I blended them on the paper in a gradient.  I then took a scalloped rectangle die and cut out the panel.  


I stamped out the iced coffee cup and coloured it in with my copics and the added glossy accents.  I then stamped the sentiment with Versafine Onyx black ink to the ink blended panel and adhered it to the card base. I took the iced coffee and popped it on of foam tape and added to the card base.  


Thanks so much for stopping by, see you again soon.

Coralynn  :)