Monday, January 2, 2017

Congratulations Baby Card!!

HELLO MINT OWL STUDIO FRIENDS!!
Larissa here today to share a SWEET CONGRATULATIONS Card!! I have several friends welcoming babies into their lives and I wanted to use the AMAZING Bundles of Joy Stamp Set to create a Card for one of them!!
Bundles of Joy
I Started by Stamping the Floral Wreath Image ALL over the Background of my Card Base using some  Hippo Lawn Fawn Ink!! I created a Grid on the Base of my Card so I could Stamp the Design evenly!! Then I erased the Grid Lines and Die Cut a Scalloped Circle Die Cut to help make the Focal Image and Banner stand out against the Beautiful Background!! I Stamped and Embossed the Banner and Sentiment and the SWEET Baby Calf Image!! Then I used my Distress Inks to Watercolor the Image and used some Foam Tape to POP it up!! I added the Banner Sentiment Image using Foam Tape too and added some Crystal Clear Sequins and my Card was Finished!! I hope this gives you some INSPIRATION on ways to create some CONGRATULATIONS Baby Cards too!!
THANKS S MUCH for stopping by and I hope you have a FABULOUS WEEK!!
COUNTRY HUGS-N-KISSES
LARISSA    =)

Wednesday, December 28, 2016

Cheers...

Hi!  It is Lisa here with you today and I have a bright way to cheer someone up...


To create this card I used the stars from the Birthday Bash Stamp set and stamped it in several bright colors.  I then stamped the cheers, glasses and arrows from the Scripty Sentiments Stamp Set onto a tag.  I layered this all onto my cardbase and finished it off with some matching sequins.


Thank you so much for stopping by and see you 2017!
Happy Crafting!
Lisa

Tuesday, December 27, 2016

Happy New Year

Good morning everyone! I hope you all are having a good week! It's Cassie, and I'm back with another card today. This time I made a cute New Years card. I can't believe Christmas is over and It's almost the end of the year. Time flies! Today's card uses the I Moose You card as well as the Party Pals stamp set.

I started this card by stamping the moose, banner, and party hat onto some Neenah Solar White cardstock in some Copic friendly ink. Then I colored them in with some New Years colors. I always think of gold, silver and black for New Years Eve celebrations. I love the way this turned out! I cut each of the images out and attached them to a card base. I also stamped the banner on either side of the center banner and drew in my own patterns instead of coloring them all. I really wanted the "happy" banner to stand out since it was part of the sentiment.
Next I used the "new year" from the Cardinal Greetings set to finish my sentiment. I also grabbed the confetti and stamped it in VersaMark all over the card and heat embossed them with silver and black embossing powder. And that finishes my New Years card!

I hope you enjoyed my card today! Thank you for stopping by. I hope you all have a great New Year, and have a happy start to 2017! I'll see you again with another card!

Monday, December 26, 2016

Happy New Year Card!!

HELLO MINT OWL STUDIO FRIENDS!!
Larissa here today to share a FUN New Year's Card!!
I hope you all had an AMAZING Christmas and are looking forward to a FABULOUS New Year!!?? I know I am!! I thought it would be FUN to use the SWEET Party Pals Stamp Set and the Half Tone Stencil to create a New Year's Card!!
Party Pals  Half Tone Stencil
I started by Stamping and Embossing the Images onto Distress Watercolor Paper and then Watercoloring them using some Distress Ink!! I had to do some Masking in order to make it look as though the SWEET Girl Image was holding the Banner!! I used some Masking Paper to Stamp the Banner Image and then Cut it out!! I Stamped and Embossed the Banner and then the Party Sentiment!! Then I placed the Banner Mask over the top of the Banner and Stamped and Embossed the Sweet Girl Image over the Top of the Banner!! I also Stamped and Embossed the arty Hat Image and then Fussy Cut it out after it was Watercolored and Dry!! I Die Cut the Image out using a Stitched Heart and then Die Cut a Stitched Rectangle to use as my Card Base!! I used some Tumbled Glass Distress Ink to Ink my Stenciled Design onto the Stitched Rectangle Card Base and I LOVE the Disco-ish Pattern that it added as a Background for my Heart Shaped Focal!! I added the Heart Focal with some Fun Foam and also popped up Card Base Panel for even more Dimension!! Then I added some Sequins and some Glitter Pen to some of the Images and my Card was done!!

THANKS SO MUCH for stopping by and I hope you have a FABULOUS Last Week of 2016 and a VERY HAPPY New Year!!
COUNTRY HUGS-N-KISSES
LARISSA      =)

Saturday, December 24, 2016

Season's Greetings

Hello everyone,

Coralynn here with one last holiday card for 2016.  I can't believe its Christmas Eve already.  

For my card I used the ornament from the Trim the Tree set and heat embossed it with white embossing powder.  I watercoloured in the image and I'm really into splatter lately so I wanted to use it on my card today as well. 


I used the sentiment from the Cardinal Greetings set and stamped it using Versafine Onyx black ink.  I then die cut the panel and added it to the black card front.  


I want to wish you all a wonderful holiday season and get to spend time with family and friends.

Thanks for stopping by!

Coralynn  :)


Wednesday, December 21, 2016

Deck the Halls

Hello!  It is Lisa here with you, and can you believe we only have 4 more sleeps until Christmas?!  Yay!  Any who I'm sharing a sweet and bright Christmas card today with all of you...


Isn't he just so cute?  This little guy comes from the I Moose You Stamp Set and I've used my new Clean Color Real Brush Markers to color him, and the background in.  Now I know this is kind of a Christmas card, so why did I make a spring background... well hey! Some places don't get snow at Christmas, so that's where this guy is... somewhere that it doesn't snow hahaha!  I then used the Banner Sentiments 2 Set for my sentiment and stamped it onto a banner die cut.  I finished it off with a bow in the corner from the Packaged Pretty Die Set.

I hope this card has brightened your day a bit and Happy Crafting!
Lisa

Tuesday, December 20, 2016

A Mermaid Christmas

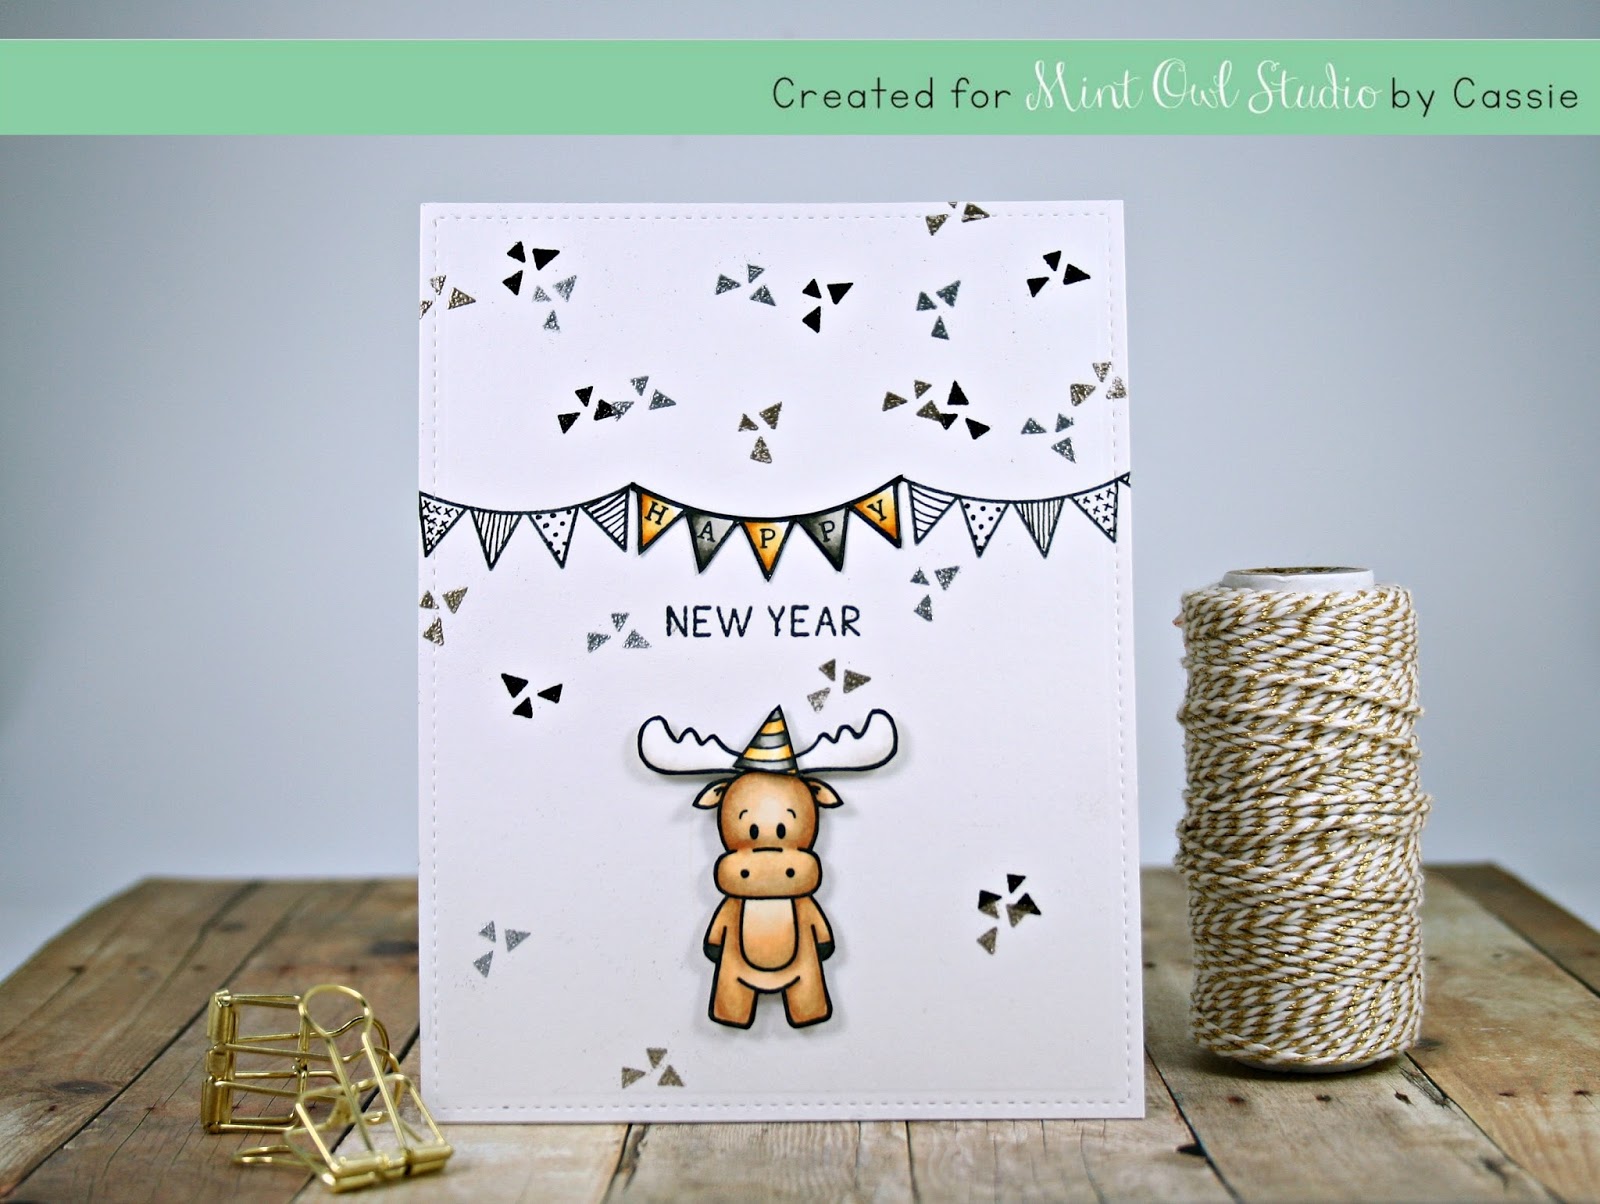
Good morning, everyone! It's Cassie here, and I've got a cute and fun card for you today! It's not a traditional holiday scene, but I think it's a fun one.
There aren't many steps to this card, as it's a one layer card, but the fun is in the coloring. I started by die cutting a stitched rectangle from some Neenah Solar White cardstock. Next I stamped all of the images you see here, from the Best Finfriends, as well as the sentiment from the Cardinal Greetings.
I drew in a line for the sand, and started coloring! I used my Copics to color in all of the little images. It didn't take long at all. The toughest part for my was the hair, but even that went pretty smooth. Once everything was colored in I took my Mermaid Lagoon Distress Ink and blended color into the background so that I didn't have to color the entire background with my markers.
I wanted to add some snow to the scene, even though they are technically underwater. I used my white gel pen to add little snowflakes to the scene, and that was it! I hope you enjoyed this card for today! I'll see you again soon with another one!