Sunday, November 6, 2016

November Instagram Challenge

Hello!

Welcome to our new monthly challenge!  Instead of hosting it here on the blog, we are hosting it on Instagram!  It seems that so many more people are stepping away from blogging and just putting photos of their cards on social media.  We know it's much easier to do and we just want to see what you are creating!


Rules:
1. Create a card based on the challenge theme.
2. Upload a photo of it to Instagram.  Tag Mint Owl Studio and add the hashtag #moscardchallenge to your post.
3. Look at the other cards with that hashtag and show some love to your fellow card makers!  Let's make this fun!

There is also a prize with each challenge!  One lucky participant will receive a stamp set of their choice.  The winner is random, so all card making skill levels are welcome.

We can't wait to see all of your cards!
Tracy

Saturday, November 5, 2016

Happy Birthday


Hello everyone,

I'm here today with a birthday day card.  I think this iced coffee from the Coffee Craze stamp and die set is the one image that I just can't stop using.  You can colour these in so many ways and it's just too much fun.

I started out with a piece of watercolour paper and I die cut it with a stitched background die and with Picked Raspberry and Aged Mahogany distress inks I blended them on the paper in a gradient.  I then took a scalloped rectangle die and cut out the panel.  


I stamped out the iced coffee cup and coloured it in with my copics and the added glossy accents.  I then stamped the sentiment with Versafine Onyx black ink to the ink blended panel and adhered it to the card base. I took the iced coffee and popped it on of foam tape and added to the card base.  


Thanks so much for stopping by, see you again soon.

Coralynn  :)

Wednesday, November 2, 2016

No Matter How Old...

I am totally loving the snarky sentiments in the new Snarky Birthday Sentiments stamp set!  It's Lisa here with you today, and I'm sharing this totally girly and fun Birthday card with all of you...


To create this card I started by stamping my fun background with the Retro Patterns Stamp Set.  Next I used various spray mists to splatter colors all over, and set this to the side to dry.  I then stamped my sentiment from the Snarky Birthday Sentiments Stamp Set onto pink paper and added the drink images from the Scripty Sentiments.  Finally I finished this off with a sparkly black bow cut with the Packaged Pretty Die Set.

Thanks so much for stopping by today and Happy Crafting!
Lisa

Tuesday, November 1, 2016

29 & Holding

Good morning everyone! It's Cassie here, and I've got a fun card for you all today. Today's card is especially fun for me because it's my dad's birthday card! Today is his actual birthday-what better way to celebrate than a blog post! :)

Here's a look at todays card
This card was fun to make. I love pulling pieces from past sets to put together an adorable scene. I started, as I often do, with a stitched rectangle card base. I also die cut a stitched heart from some Neenah Solar White cardstock. I took the (adorably sweet) sloth from Sloth Hang Out set and stamped him on the center of the heart. I made sure that I didn't ink up the ends of the tree limb because I wanted to extend them to the end of the heart, which I did with a Copic multiliner. I applied Tumbled Glass Distress Ink to the edges of the heart with a blender, and Chipped Sapphire to the card base panel. I love these colors together! And, my dad's favorite color is blue so it's perfect in that aspect too.
After the sloth and tree limb were colored, I stamped and colored a bunch of the presents from the I Moose You stamp set and a birthday hat from the Party Pals stamp set. I popped the heart up with some foam tape after splattering some white paint on the card base. Then I attached the present balloons and drew lines for the strings. The final touch was to stamp the sentiment from the Snarky Sentiments set. I love that it says 29 & holding, with a picture of a sloth hanging onto a tree. Too cute! I also added a couple white accents with my white gelly roll pen.

That's it for today! I hope you liked the card. There are so many fun ways to pair the Snarky Sentiments set with loads of the other stamps sets- I can't wait to try more combos! Thanks for stopping by and I'll see you again with another card!

Monday, October 31, 2016

Happy Birthday Matey!! =)

Hello Mint Owl Studio Friends and
HAPPY HALLOWEEN!!
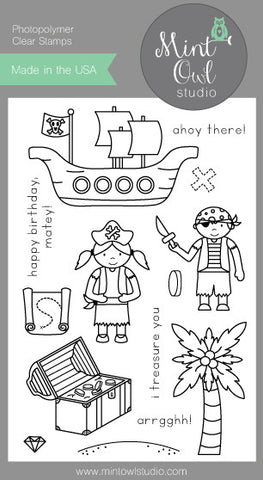
Larissa here today to share a FUN Interactive Happy Birthday Matey Card!! I wanted to make something that would correlate with Halloween and I thought this was the PERFECT choice!!
I started by Stamping and Embossing ALL of my Images from the AWESOME
"A Pirate's Life" Stamp Set!!
A Pirate's Life
 I used my Distress Inks to Watercolor them!! I Fussy Cut them out and leaving a small white border to Finish off the Edges!! I wanted to create an Interactive Card so I created the Channel in the Ocean for the Pirates Ship to be able to Glide across the Ocean and to Land on the Shore!! I Layered all of the other Images and Stamped and Embossed the Sentiment too!! I just LOVE LOVE LOVE the way it turned out!! =)
                           
 Hopefully you feel INSPIRED to create a FUN Interactive Card using your Mint Owl Studio Products and if you do I hope you'll share the with us because we LOVE LOVE LOVE to see what you create!! THANKS SO MUCH for stopping by today and I hope you have a
FABULOUS WEEK!!
COUNTRY HUGS-N-KISSES
LARISSA     =)


Saturday, October 29, 2016

Deck the Halls

 Hello everyone,

I'm back with a Christmas card from our Trim the Tree stamp set and the Christmas Quilt Stencil.

As I was creating this card my daughter wanted to help so she fussy cut one of the boughs and I added it along with the others.  She will be tickled that it made it to a blog post!


I stamped and coloured in the ornament and pine boughs black in and coloured them in with my copics.  I fussy cut these out and for the ornament, I added glossy accents to make it shiny.

For the front panel, I used the Christmas Quilt Stencil and blended in Candied Apple and Lucky Clover distress inks.


To create the card base I die cut two panels and scored one of them on the top at about 1/4 down and adhered it to the front panel making this a shaped card.  

I cut out a smaller panel and stamped the sentiment with black ink and popped it up on foam tape.  I then added the boughs and ornament. 

Thanks for stopping by, see you again soon. 

Coralynn  :)


Thursday, October 27, 2016

One-Layer Card featuring Ice Cream, You Scream

Happy Thursday, friends!  It's Tara and today I thought I'd take a break from Halloween and fall card making to create a fun and colorful anytime card!  I just love the Ice Cream, You Scream stamp set and I hadn't had the chance to use all of the super adorable little smiley faces that are included so I really wanted to stamp out some smiley ice cream cones!


I kept this card nice and simple by doing some easy masking to create a one-layer design.  I first stamped all three of my ice cream cones and my sentiment.  Next, the cutie little smileys were added. I created one mask of the ice cream cone and used a circle die to cut a piece of mask paper to create a reverse mask - I didn't use the circle but rather the remaining mask paper so I could ink up inside the circle. 


By first masking the ice cream cone and then placing my circle reverse mask over the top I was able to create the fun spotlight effect behind each cone!  I overlapped my colors to add more dimension but you don't have to do that if you don't want to.  Here are a few tips I picked up while doing this technique that I'll remember for next time: 1) Let the ink on your mask fully dry before applying ink over the top to avoid black smudges, 2) don't use a stitched die for your circle unless you want ink to show through the stitching detail, and 3) Mama Elephant pigment inks are GORGEOUS and blend really easily!!  It's all just trial and error and I love to learn from my mistakes so that I can avoid them next time!


I used Prismacolor pencils and Gamsol to color in my ice cream so that they would have the same smooth, blended look at the background circles.  Every time I use this technique I just love it and wonder why I don't use it more often!  Need to log that away for future projects!


I hope you enjoyed this bright and cheery card!  Don't you just love that sentiment?!  Thanks so much for stopping by and I'll catch you next time!  Bye!