Monday, November 21, 2016

Interactive Construction Scene Card!!


HELLO Mint Owl Studio Friends!!
Today I have a FUN Interactive Card to share using the "Under Construction" Stamp Set and I LOVE LOVE LOVE the way it turned out!! I started by Stamping and Embossing the Images onto Distress Watercolor Paper!! Then I Watercolored the Images and my background with Distress Inks!! I wanted the Card to feel like the Excavator was Loading up the Dump Truck so I created a Slider with a Hole in the Center so it looks like the Hole was created by the Digging!! I Then added the Images onto some Penny's for my Sliders and then added the Construction sign in the Back of the Dump Truck!! I LOVE LOVE LOVE the way it turned out and hope you do too!! 
                           
THANKS SO MUCH for stopping by and I hope you have a FABULOUS WEEK!!
COUNTRY HUGS-N-KISSES
LARISSA    =)

Saturday, November 19, 2016

Naughty or Nice?

Hello!  It's Lisa here with you today and I have a cute little Christmas tag to share with all of you today...


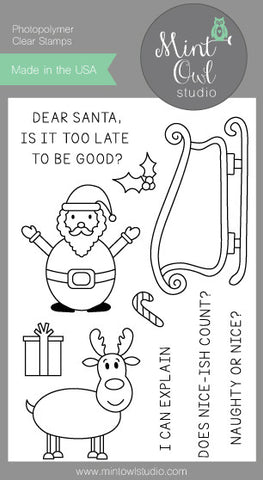
To create this tag I used the super cute Dear Santa Stamp Set.  I just love this little round Santa and the Reindeer in it too!  Anywho, I started by die cutting my scallop and circle shapes. I then stamped the Santa, present, and sentiment onto the kraft cardstock with Memento Ink.  I used my Prismacolor pencils this time to color Santa and the present in ( I also have to mention that my daughter helped pick out my color pallet, I'm very scientific like that hehehe! ).  Next I used white enamel gel at the top, that I was hoping to have represent snowflakes, but when it dried it looked clear.  So instead it just added some texture to the background, and I have to say it has kind of grown on me and it doesn't look too bad.  To finish the tag off I tied the top off with red and green twine.

Thanks so much for popping by today and don't forget to share your Mint Owl Studio projects with us on any of our media feeds!
Happy Crafting!
Lisa

Wednesday, November 16, 2016

Happy Birthday

Hello everyone,

Coralynn here with a birthday card for you today.  

The MOS stamp sets I used for today's card are Happy Moments and Love for Mom.  

I stamped the flower on white 110# card stock with intense black ink and coloured them in with my copics.  I fussy cut it out with my scissors and went along the edges with a black Memento marker to clean up the image. 


I created the background with a candy striped background stamp and used grey and purple inks.  I used a rectangle die to cut out the plaid panel along with a piece of vellum.  

I stamped the sentiment on the vellum with Versafine Onyx black ink and heat embossed with the Wow black embossing powder.  I added the flower with the foam tape to the vellum and I adhered the vellum panel to the plaid panel with liquid adhesive.  


I coloured the scalloped frame with the same purples as the flower so they would match and added it to the rest of the panel. I then adhered everything to the card base and added a few finishing touches with enamel dots and a lot of sparkle pen to the flower.


Thanks for stopping by, see you again soon!

Stay crafty  :)
Coralynn

Tuesday, November 15, 2016

Interactive Holiday Gift Tags!! =)

HELLO MINT OWL STUDIO FRIENDS!!
Larissa here today to share a SWEET Gift Tag!! The Holiday's are approaching FAST and how FUN is it to use those Products that you may already have on hand to use for your Holiday Gift Giving too!!?? I LOVE LOE LOVE being able to use my products for making my own Holiday Gift Tags!!
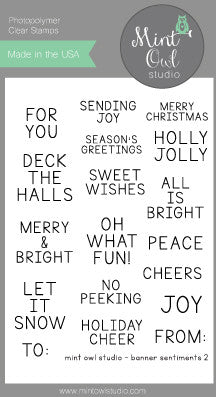
I'm using the AWESOME Dear Santa Stamp Set and the Banner Sentiments 2 Stamp Set for my Projects today!!
Dear Santa Banner Sentiments 2
                           
When I make Gift Tags, I like to do them assembly Line Style as  feel I can get more made in a faster amount of time!! So I Stamped and Embossed ALL of my Images and Sentiments first onto some Distress Watercolor Paper!! Then I used my Zig Markers to Watercolor them!! I used a FUN Interactive Tag Die and I LOVE LOVE LOVE the FUN Design!! So I adhered the Tags together and my Tags were done!! I made this FUN Painted Mason Jar too to use for some YUMMY Treats!! How EASY and FUN for giving during the Holidays to BRIGHTEN someone's day!!?? I hope you're INSPIRED to make some for you own Holiday Gift Giving needs!!?? If you do I hope you'll share as we LOVE to see what you create using the AMAZING Mint Owl Studio Products!!
THANKS SO MUCH for stopping by and I hope you have a FABULOUS WEEK!!
COUNTRY HUGS-N-KISSES
LARISSA   =)

Monday, November 14, 2016

Holiday Cheer

Good morning everyone! I hope you are all having a great Monday. It's Cassie here and I've made a cute and simple holiday card to share with you! Today I've used the Banner Sentiments 2 stamp set, Coffee Craze  stamp set, and a small die from the Packaged Pretty die set.

I started by stamping two of the cups with whipped cream on top onto some Tim Holtz water color paper. I had die cut the paper with a stitched rectangle die. Because I wanted one in front of the other I masked the red cup so that it would look as if the green cup was behind it when I stamped it. I colored both cups in with Zig Clean Color Real Brush Markers. I made sure they were completely dry and stamped the two sentiments, both of which were from the Banner Sentiment 2 set, in VersaMark ink and heat embossed them with white embossing powder.
Then I took the dot from the Packaged Pretty die set and die cut a bunch of dots from the panel of my card. This was a little time consuming, and it is difficult to see in the videos, but it looks so fun in real life, and I love the snowy look it gives! I also die cut the bow from the set and colored it with the same green as the cup. I added some little dots to it to give it a little interest.
I attached another piece of water color cardstock to the back of the card panel and put it so the textured side of the paper was up to give it a little contrast to the smooth side I had picked to do my stamping on. The last step was a little glitter pen on the whipped cream and bow, and attaching it to a card base!

That's all for me today! I hope you enjoyed this fun card, and I'll see you again soon with another one!

Saturday, November 12, 2016

Dear Santa, is it too late?

Hi everyone,

I'm back with a Christmas card for you today and I chuckle every time I see this sentiment so I thought I would add it to my card. 


I cut a piece of patterned paper and cut it out with a stitched rectangle die and cut out a couple of snow drifts with some stitched hills die and cut them out of white card stock.  I added the sentiment to one of the hills and added them everything to the card base with liquid glue and foam tape.


I used the rein deer, sleigh,candy cane, present and the holy from the Dear Santa set and coloured them in with my copics and added some glitter to the sleigh.  You can't have a Christmas card without some glitter. I then added three enamel dots to finish off the card.


Thanks so much for stopping by, see you again soon!

Coralynn :)

Thursday, November 10, 2016

Non-Traditional Christmas featuring Trim the Tree

Hey all and happy Thursday!  It's Tara and today I am sharing a  project with you all featuring the adorable Trim the Tree stamp set and some non-traditional Christmas colors. I just love pink and teal  holiday themes and thought it would be fun to play with on this project!


This type of stamping is fabulous for when you want to crank out a card really quickly!  My family has been busy of late and I had limited time to bust this out but this technique makes it really easy to create a beautiful card in no time!  I used Lawn Fawn inks to stamp the ornament images on some Neenah 110 lb cardstock.  To get the full colored image I simply used the back of the stamp!  How easy is that?


I added some silver accents to all of my ornaments and paired them with some Lawn Fawn Perfectly Plaid Paper.  I love how this sweet and simple card came out and I love even more that it only took ten minutes to create!  


Thanks so much for stopping by and I will catch you next time!  Bye!